Showing posts with label diy. Show all posts

Friday, September 30, 2016

DIY Monster Mobile

My main DIY project for this month was to make a baby mobile.  Not professional, but made with the sincerest of love.  I had been looking online for inspiration and found so many amazingly wonderful baby mobiles.  I thought that, with a little time and effort, I could make one just as amazing.

For a few days, I was going through ideas…Beach themed?  There had been people who had made beautifully beachy seashell mobiles that cascaded down towards the crib.  Nature themed?  There were mobiles made of twigs and little owls attached to the branches that looked rustically cool.  Monster themed?  One mobile that caught my eye was a monster mobile that someone had made with multicolored monsters…

The monster mobile was the one that captured my heart!

So, I took a trip to the Hong Kong International Airport's Jusco Living Plaza (as I usually do these days) and picked up a few supplies that I needed to make this mobile.

Enough of the back story…

Here's What I Used For My DIY Project:
1.  Felt for Monster Bodies
2.  String for Attaching Monsters
3.  Eyes from Jusco Living Plaza
4.  Pipe Cleaners from Jusco Living Plaza
5.  A Pot Holder I Found at a Local Kitchenware Shop
6.  Felting Needles I Got from my Sister
7.  Hot Glue Gun and Glue Sticks
8.  Scissors for Cutting Things

***The hole puncher in the picture was not used for the actual project!!!!***


Felt

Strings

Eyes

Pipe Cleaners

Pot Holder

Felting Needs to FELT the Felt!

Here's What I Did:
1.  FELTING IT

I felted the felt into balls or round shapes


2.  STRINGING IT

I tied the strings around the center of the balls.  One half would be my monster heads.  One half would be my monster bodies.  I also left the strings long so that I could attach them to the pot holder/mobile holder.


3.  EYEING IT

I then hot glue gunned eyes and pipe cleaners on to make my monsters.


4.  FINISHING IT

I then tied the strings onto the pot holder, which was my mobile holder.  And I hot glue gunned the rest of my materials (just to not waste anything) onto the strings to hide the ties.


My Monster Mobile:


And here is the final product.  My monthly DIY project completed!

It was a fun project to do this month.  It was also quite easy to find the materials and to put it all together.  Though, the process of felting took a bit of time.  They aren't anything special, just round objects, but the project did take time.  In the end, I just love that it turned out so well!

Friday, February 5, 2016

DIY: Almond Butter Cookies

Since the weather had turned cold for a few days, I didn't feel like heading outside any time soon…But, I did feel the need to have some cookies in my life.  I had been looking online for some healthier alternatives to some of the more sugary-types of cookies out there.  It's partially because I have to cut back on my sugar in-take (I am a dessert-lover) for the sake of my own health. 

Anyhow, I came across a really simple Buzzfeed recipe for a 3 ingredient Peanut Butter cookie.  It was so simple that I totally knew that I could swap out the ingredients for things that I had already in my own pantry.

So, for the sake of trial…I made a half dozen cookies for my first batch.  They came out pretty well…so I made a half dozen more (which this blog is based on) as my second batch!

*NOTE:  My portions are to make just a small batch of 6 small cookies…for afternoon tea!

Ingredients:
1.  1/2 cup of Almond Butter
2.  1/4 cup of raw sugar
3.  1 teaspoon of chia seeds soaked in water for about 10 minutes
4.  Optional:  Some whole wheat flour to make cookies "drier"


What I did:
1.  Firstly, I got a teaspoon of chia seeds and set them in a bowl.  I poured about 2 tablespoons of water over them and let them sit unit they congealed…this was my egg substitute (egg was used in the original recipe).

2.  Then I poured in my 1/4 cup of raw sugar, 1/2 cup of almond butter, and my congealed chia seeds into a bowl and mixed them together to create my cookie dough.

*I also sprinkled in some whole wheat flour to make the cookies have a more doughy taste.  My first batch came out too sweet as well…so adding the whole wheat flour dialed down on the sweetness.  But, this could be left out for those of you who do love sweet things!


3.  Then I rolled up my dough into little balls and put them onto my silicon-baking mat.


4.  I then got my fork (which I used to mix the dough) and put in fork marks (like the video!!)…which made them look quite nice and more professional!  Ha!


5.  I popped this batch into my toaster oven (which only has one heat setting)…and baked them for about 15 minutes.  I just watched them every 5 minutes.  And I poked a knife through one around the 10 minute mark to see if it was worth taking them out yet.

But, my second batch of cookies stayed baking in my toaster oven for about 15 minutes and they came out really well!  I surprised myself at how they came out!  They were crispy on the outside, moist and sweet in the inside…and the chia seeds were such a great substitute for the egg in the original recipe!  WHO KNEW!!!


It was a great little afternoon tea treat that I will probably add to my repertoire of afternoon tea dishes to serve to friends!

Wednesday, January 27, 2016

DIY: Healthier Ramen

I've been heavy into watching competitive eating videos on Youtube…not sure why.  I guess watching them makes me live vicariously through them…I always feel full after seeing them eat a hundred pieces of KFC chicken!  Some of my favorite videos to watch have been by Yuka Kinoshita.  I just love this girl's positivity towards the taste of food…it makes me thing that everything in Japan must be delicious!

Watching her videos made me miss Japan a lot too!  It's just such a wonderful place to experience life!

But, thinking about all this…I decided to make myself some ramen…but healthier ramen…because it is a new year and I am trying to be more conscious of my health (the years are catching up with me).


Looking up some recipes online, a lot of people say that a healthier ramen means:

1.  Use less of the sauce packet

2.  Load your noodles with veggies

Sounded easy enough!

What I used:
1.  1 Packet of Shin Ramen
2.  A tomato
3.  A bit of enoki mushrooms
4.  A bit of lettuce

This was just a personal-sized ramen bowl for one.


What I did:
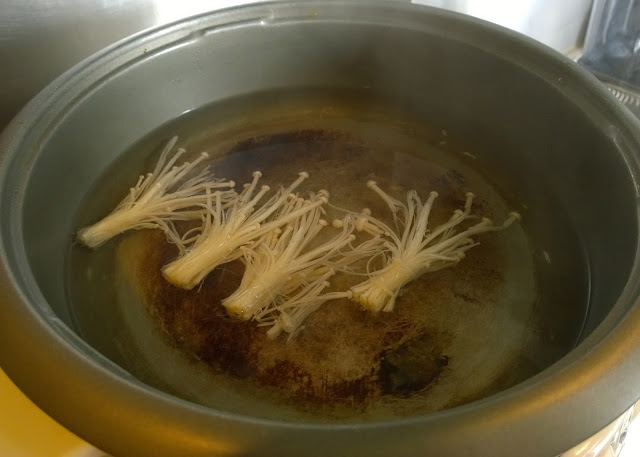
1.  I first boiled some water and threw in my enoki mushrooms.  5 minutes should suffice.

I always feel like I have to cook mushrooms longer than everything else.  Back when I lived in Japan, I would get mushrooms from the supermarket a lot.  Some times, when I didn't cook them well enough, I would find myself having major stomach problems (you know what I'm talking about…).  So, I boiled my enoki mushrooms for about 5 minutes.


2.  Then I threw in about 1/4 of the sauce packet and my noodles.  I let my noodles "cook" for about 1 minute.


3.  Then I threw in my lettuce and let them cook for about 30 seconds.  I like my lettuce to be crunchy, so I don't usually boil them for long. 


4.  Lastly, I threw in my tomatoes, sliced.  I also don't like my tomatoes to be too mushy, so I cooked them for about 30 seconds…

I think the timing of putting in each ingredient is quite important.  The mushrooms were fine being cooked for a longer period of time.  The noodles (as instructed by the packet) should cook for 3 - 4 minutes.  And my veggies, which I like to be quite crispy would cook the shortest amount of time.


5.  Afterwards, I drained most of the soup from my pot and poured everything out into my bowl.  I poured in some soup…which I realize you cannot really see in the photo below!


After making this, I thought it was quite similar to making hot pot.

It was good.  It had a nice little bit of spice from the sauce packet…it was lower in sodium for sure…and I could get in a reasonable amount of veggies.

Two thumbs up in my book.

Give it a try if you are trying to make a healthier ramen!

Friday, December 18, 2015

DIY: Gingerbread Christmas Tree

Christmas is only a week away!  A few days ago, while down in Central, I stopped by City Super to pick up a gingerbread tree decorating kit.  I thought it would be a great addition to the Christmas traditions that my family (here in Hong Kong) and I could do together.  Plus, it is another great way to integrate my culture into theirs…and make me feel more at home during the holidays.


This gingerbread tree decorating kit was 100 HKD, which I thought was pretty reasonably priced.  There were other decorating kits:  gingerbread men, gingerbread variety cookie packs, gingerbread houses, and gingerbread villages.  They were all around the 100 - 200 HKD mark.  And all came with pre-made gingerbread!


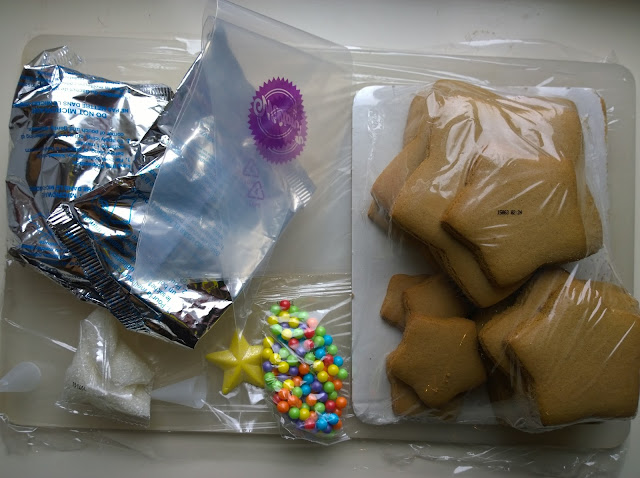
Our kit came with a bunch of star-shaped gingerbread cookies, bigger ones for the base and smaller ones to be stacked.  It also came with pre-made icing, some sugar baubles, and a sugar star.  Besides the edibles, the kit came with some piping bags and nibs.


It was pretty self explanatory, but we basically just stacked up our tree from the biggest stars to the smallest stars.  We got some icing and put a dot between each layer to secure the tree.


Then we went at it!  At first, we were trying to be nice and precise, but then we decided to just drench the icing all over the tree.  Either way, it still came out looking impressive and tasted like Christmas.  The icing sooooo reminded me of Christmas.


After slathering icing all over our tree, we then dotted it with our sugar bobbles, sprinkled some sugar granules  all over … and topped our tree with our yellow sugary star.


Our final results!

Back in the day, I remember making a few gingerbread houses with my family.  I think it was my aunt who really organized it.  But, my cousins, my siblings and I would gather around at my grandmother's house and decorate the gingerbread houses that my aunt had made for us.

Such wonderful memories…I hope to keep this tradition up…because who doesn't need more sugar during the holiday season!?

Wednesday, October 21, 2015

DIY: Dried Cranberry Muffins

'Tis the season for buying dried cranberries!

I was looking online for some muffin recipes and came across this one, which is a basic vanilla muffin recipe.

But, I decided to toss in some alternative ingredients and LOW AND BEHOLD, it turned out quite nice!


What you need:
1.  2 cups flour
2.  1 cup sugar
3.  1/2 teaspoon salt
4.  1 egg
5.  3/4 cup almond milk
6.  1/3 cup vegetable oil
7.  1 cup of dried cranberries
8.  1 teaspoon vanilla extract


What I did:
1.  First, I incorporated all of the dry ingredients into a bowl:  flour, sugar, salt


2.  After mixing the dry ingredients together, I incorporated the wet ingredients:  egg, almond milk, vegetable oil, and vanilla extract


3.  After mixing all that together, I dropped in a cup of cranberries and mixed that into the batter


4.  Then I loaded my muffin batter into my cupcake cups and put them into my toaster oven for about 22 minutes.

NOTE:  My toaster oven was set to the highest heat, which I have no idea what it is because it is not written anywhere.   This is where I kept an eye on my muffins to see if they were cooking through (I stuck a toothpick through the center of a few to see if the batter was completely baked).


5.  After about 22 minutes, I pulled the muffins out and let them cool before putting in my second load!


In the end, here is what I got.  They were actually quite CONDENSED and HEAVY.  I think it was because I didn't use self-rising flour and olive oil.

But, they where really nice to eat.

Next time, I'm going to try them with self-risng flour for sure…and some vegetable oil!

Wednesday, October 14, 2015

DIY Corn Salad

Summer seems to be officially over!  That's a nice change of weather for me because now it sort of feels like Fall, with the cooler evenings and the overcast skies.

In celebration, I decided to make a summer salad, as a parting lunch.

Here is a salad where all the ingredients can be easily found in any Hong Kong supermarket.  


What you need for the Salad:
1.  A cup of canned corn
2.  A green bell pepper
3.  A tomato
4.  A bag of cranberries

For the Dressing:
1.  1/4 cup mayo
2.  2 tablespoons of lemon juice
3.  3/4 teaspoon mustard (the recipe online called for ground mustard, but normal mustard is fine)
4.  1/4 teaspoon sugar
5.  Salt/pepper to taste

NOTE:  This makes a hefty two person meal


Preparing the Dressing:
1.  Firstly, I measured out 1/4 cup of mayo, mixed in the 2 tablespoons of lemon juice, and then added 3/4 of a teaspoon of mustard, 1/4 a teaspoon of sugar, and some salt and pepper.  I mixed it all up and got the lovely dressing (pictured above).


Preparing the salad:
2.  Then I opened and drained the canned corn, chopped up my tomato, chopped up my green bell pepper, and threw in my bag of cranberries.
3.  I divided the proportions into two bowls (though only one is pictured above).


The final step:
4.  Then I poured the dressing all over the salad and mixed it all in.  I refrigerated the salads for about an hour before we CONSUMED them.

Overall feelings:
1.  I like testing out new recipes online
2.  The corn salad is really awesome for the summer/fall
3.  Corn salad is pretty filling, which I love
4.  I'm going to add this to my repertoire of things I can make in Hong Kong!

Friday, September 11, 2015

DIY: Homemade Hummus

Today was just one of those days when I just had the need to snack on something.  I decided to look up hummus recipes and make some of my own!  

NOTE:  All ingredients can be easily found in any grocery store in Hong Kong.  I went to my corner Park n Shop, which usually doesn't have much of what I need (i.e., baking soda or olives!), but I did manage to find a stock of Garbanzo beans.

What you need:
1.  A blender
2.  A can of Garbanzo beans
3.  1/2 teaspoons of cumin
4.  2 tablespoons of lemon juice
5.  3 cloves of minced garlic (I used 1 tablespoon of minced garlic)


What to do:
1.  Drain the Garbanzo beans
2.  Put the drained Garbanzo beans, cumin, lemon juice, and garlic into the blender
3.  If it takes a bit to get the blender going, put in a few drops of water and blend until smooth (I left mine a bit chunky…I like a chunky hummus)

My ending results was a pretty awesome hummus, which was full of garlic flavoring!  It was a nice spread.

Fun Fact:  One recipe that I looked at suggested to add 2 ounces of sliced jalapeños (if ever I can find these guys, I'll buy them and put them in my future hummus).  I love me a little spice now and again.


Some suggestions on hummus coupling:
1.  Carrot sticks
2.  Cucumbers sticks
3.  Toast slices

When I was grocery shopping in the morning, I also picked up some carrots, cucumbers, and wheat bread.  I cut up a carrot and a cucumber into sticks.  And I toasted a piece of wheat bread.  I put them all into a plate and….


…Voilà!  A great afternoon snack for two!


The ending results:
1.  For my first hummus trial, I thought it was pretty delicious.  Though, I put in too much garlic.  I'll adjust that the next time I make this.

2.  The carrot and cucumber sticks were really great with the hummus.  And the piece of toast was also a great mix.

3.  Though I was making a snack for two, I actually used about half of my hummus and kept the other half for another day.

NOTE:  I wouldn't keep the hummus for longer than 3 days, though.  I'm thinking that it'll probably be eaten by tomorrow morning.  But, I'm not sure when it will spoil.  I feel pretty safe to say that it'll keep for tomorrow.

Friday, July 10, 2015

DIY: Greek Salad

Another easy recipe…

...which is great for the summer months…

…which was inspired by Sandy from Easy Cooking with Sandy

...and which I have been having most lunches this week…

is a Greek Salad.  

NOTE:  Most ingredients can be easily found in the local Hong Kong supermarkets, but some items (like the feta cheese) probably has to be found at the local Taste or Fusion rather than the Park N Shop or Wellcome.

The recipe is good enough for two people.

Ingredients:
1.  Half a head of lettuce
2.  Half a cucumber
3.  1/4 of a red onion (more if you like onion!)
4.  Half of a red bell pepper
5.  Half of a green bell pepper
6.  Two tomatoes (more if you like!)


7.  Some Fetta cheese (I used about half of the block that I bought)
8.  The juice and zest of a lemon (for the dressing)
9.  Salt (as much as you like to taste)
10.  Pepper (as much as you like to taste)
11.  1/2 tablespoons of oregano (for the dressing)


12.  3 tablespoons of olive oil (of the dressing)
13.  1/4 teaspoon of minced garlic (or more if you like) for the dressing


Instructions:
1.  Chop up all the lettuce, onion, bell peppers, tomatoes, cucumber, and fetta cheese (into little blocks or crumble them if you like).

2.  For the dressing:  Add the olive oil, minced garlic, lemon juice and zest, and oregano into a separate bowl.

3.  Mix the dressing together, then pour it over the salads, mix the dressing in with the salad.

4.  Salt and pepper to test.

And Voilà!


The ending results is a tangy, crispy, and lovely Greek Salad for two!