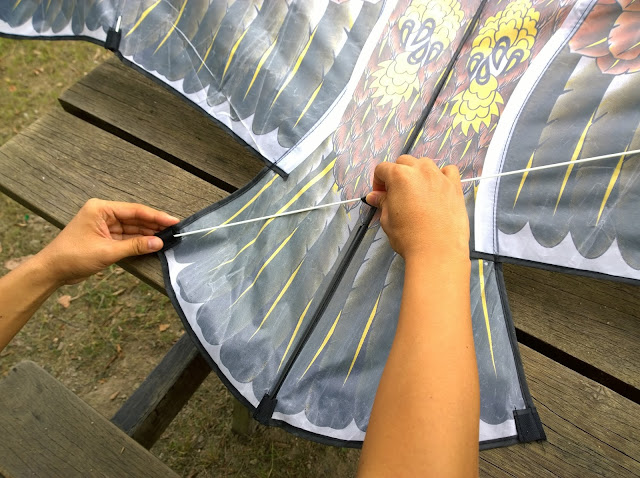
When we first bought our kite, we thought it would be pretty simple to construct it. We were totally stumped though and had to have one of the kite sellers help us to assemble our kite. I thought it might be interesting to share how we put our kite together…
Since it is coming on Fall and the winds will be picking up soon (typhoon season!).
1. Our kite kit came with our kite and a reel of string.
2. The actual kite comes with three rods and the kite. There are two black rods and one smaller white rod. The black rods connect and span across the wings of our hawk kite.
3. The kite has to be facing you! So, when assembling the kite, the black rods (which you can connect to make one long black rod) span from one wing tip to the other. There are three little ribbons that the rod passes through, which you can see in the photo below.
4. On both ends of the hawk's wings, there are two plastic stoppers for you to insert the ends of the black rod.
5. The result of inserting the black rod should be sort of like this (if you do have a kite similar to ours):
6. The final white rod is meant to stabilize the tail of the hawk kite. Here is where we flip our kite over to the back side (the side of the kite that faces away from us when we fly it) and insert it through the ribbon and stoppers.
7. The final step is to connect the string to the front of the kite. We were taught to just tie it to the center of the black rod. We just double knotted it three or four times and that was it!
Some tips when flying a kite:
1. Check the weather report for wind!
2. Fly in an open area!
3. If your reel of string has a string guider, use it so that the string doesn't get tangled!
4. RUN to get the kite going!
5. If the kite keeps falling…don't worry, that's all apart of the experience!
Happy KITING!


